Adv Image Manager
Back up and recover Windows IoT or Ubuntu systems through a guided Power Suite workflow.
Platform Differences
| Topic | Windows | Ubuntu |
| Environment | Replaces built-in Windows RE with a new WinRE and creates an ADV Backup partition. | Creates a partition on the system disk to store backup images. |
| Backup target | Backs up the C: partition. | Backs up the Ubuntu system partition. |
| Recovery options | Recovery Default, External Recovery, EFI Shell recovery, and Bootable USB recovery. | Recovery and Image Deployer rescue USB. |
Windows Workflow
Information
ADV Image Manager is used to back up and recover computer systems. On Windows, backup and recovery can be started from the desktop application. When the computer cannot enter Windows, ADV Image Manager can also be started from EFI Shell to recover the system.
Environment setup creates the recovery foundation, Backup captures the system state, and Recovery restores the system from an internal or external backup image.
Environment Setup
Environment setup prepares ADV Image Manager by replacing the built-in Windows RE with a new WinRE and creating the ADV Backup partition on the system disk. This gives the device a recovery environment that Power Suite can control during backup and recovery.
Use this setup after the Windows IoT image, drivers, applications, and required settings are ready. During environment creation, do not plug in or remove external storage devices and do not change disks or partitions.
Only UEFI systems are supported, and ADV Image Manager backs up the C: partition.
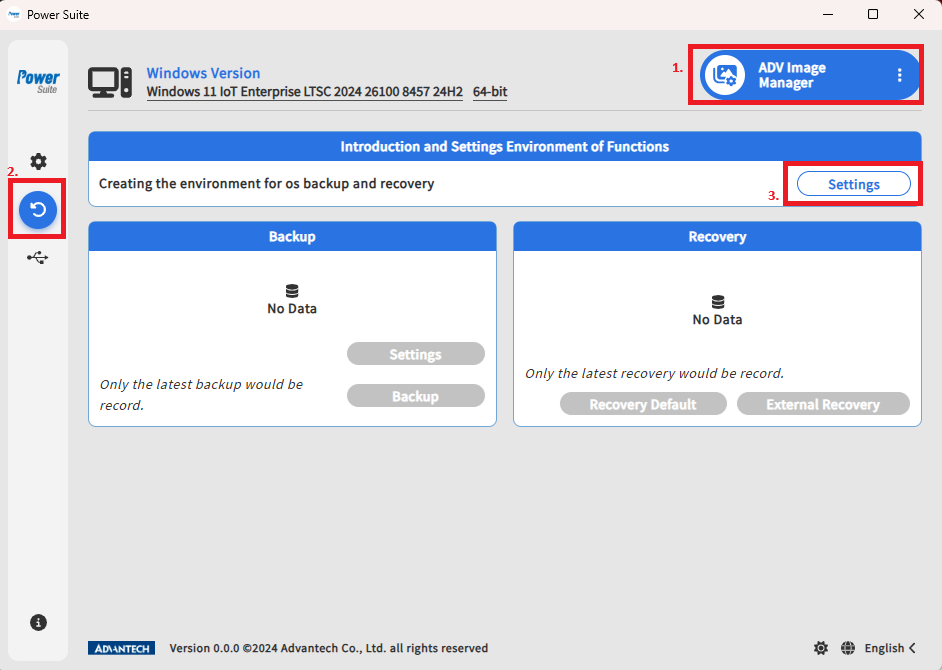
Create Image Encrypted Backup
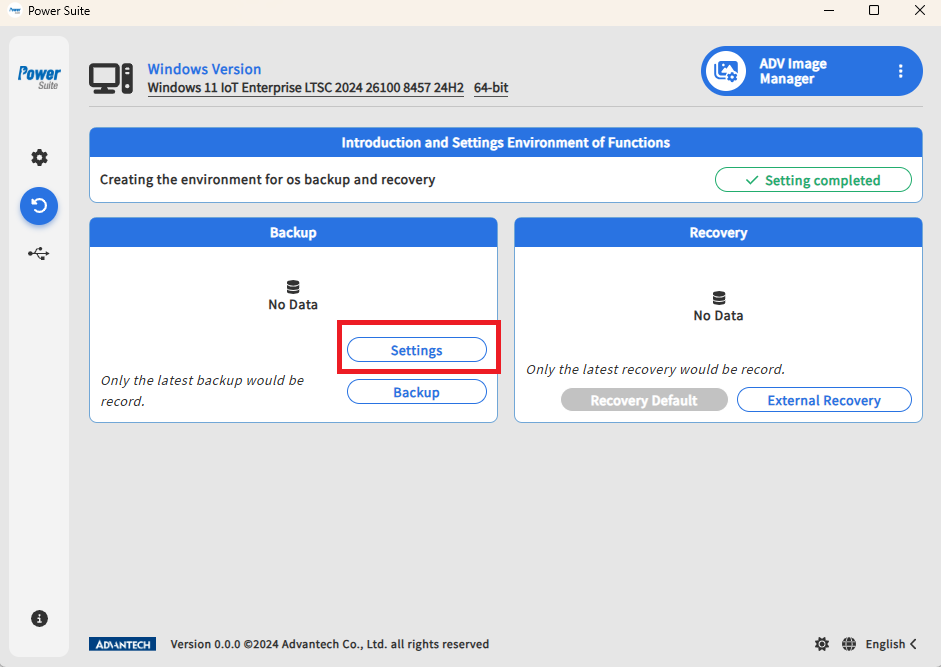
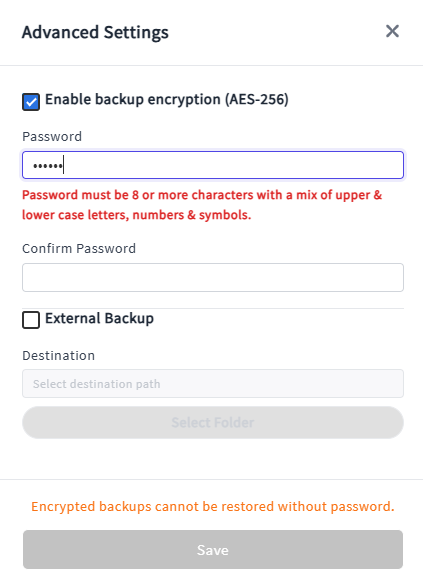
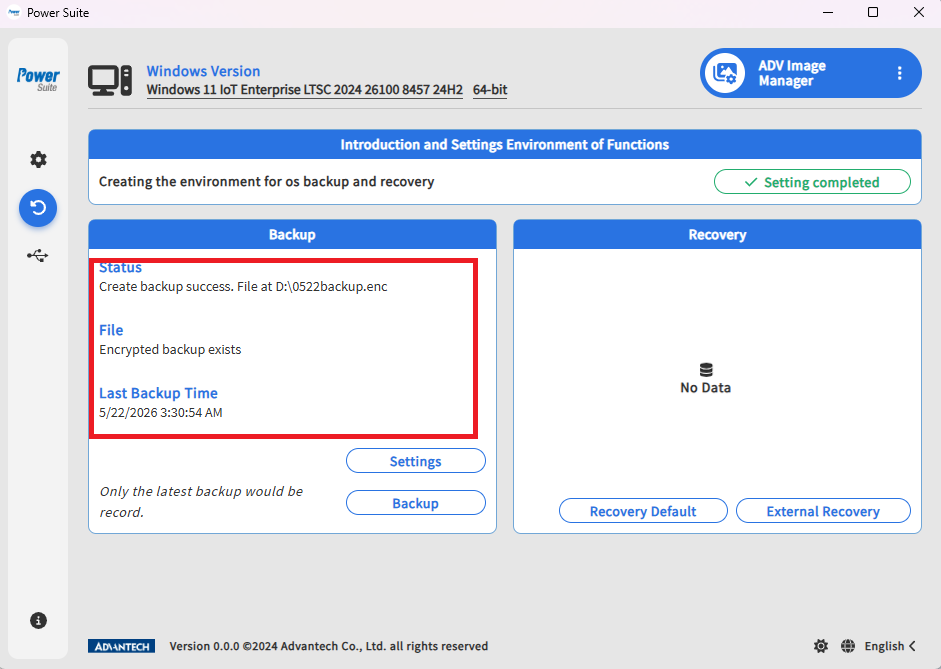
Open Advanced Setting from the Settings button to configure encrypted backup and external backup options. To enable encryption, enter the password twice. The password must use 8 or more characters with a mix of uppercase letters, lowercase letters, numbers, and symbols. If the password is not complex enough or the two passwords are different, Power Suite displays a warning.
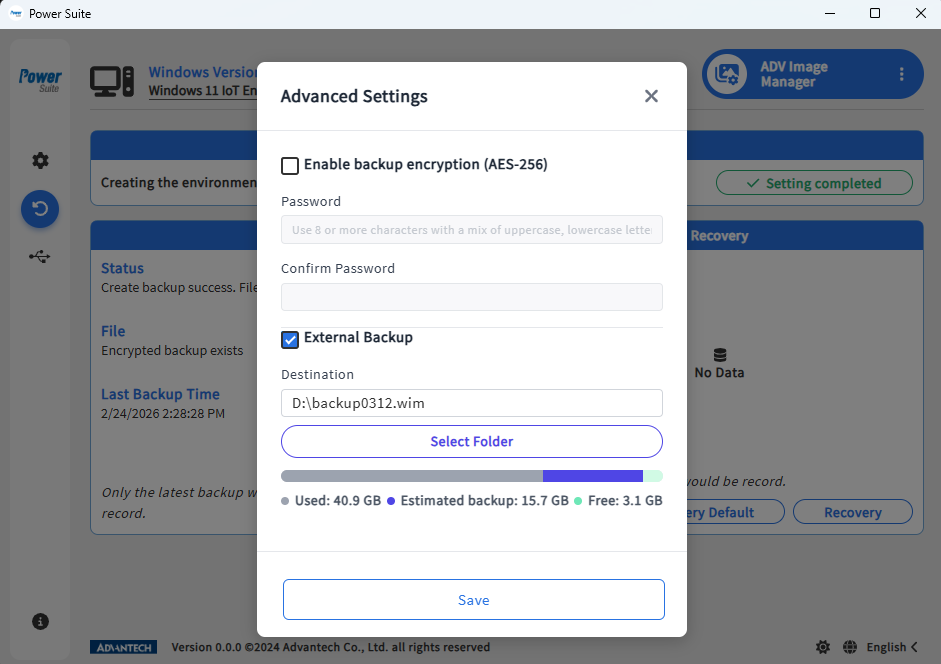
To enable external backup, select the external backup option and choose a backup path. The C drive cannot be selected, the selected storage must have sufficient space, and FAT32 file systems are not supported. Invalid locations show error messages on the screen.
When all checks pass and no red warning text is displayed, click Save. After confirming the password and external backup path, click Backup and Confirm. The system restarts into WinRE and starts backup. Keep ADV Image Manager open and keep the system focused on the command prompt while backup runs. When backup finishes, the system restarts into Windows. If the last successful backup was saved externally, the Status field also displays the external path.
Recovery from the Desktop Application
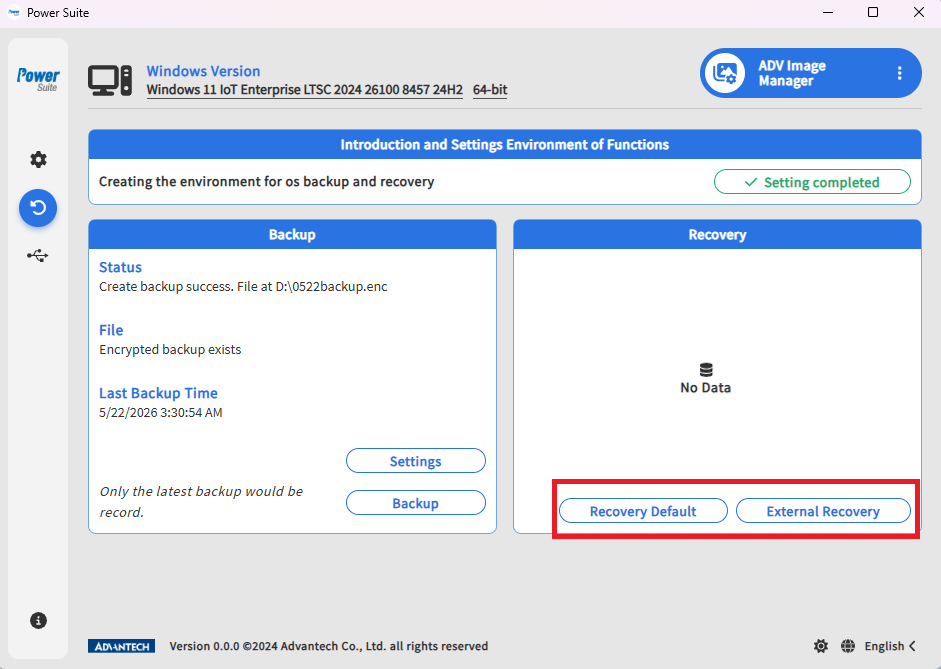
ADV Image Manager provides two recovery methods from the tool.
- Recovery Default: restores the system from the backup file stored internally in the system. This option is available only when a valid internal backup file exists.
- External Recovery: restores the system from an external backup file. After an external file is selected, ADV Image Manager verifies the file to make sure it is valid and can be used for recovery.
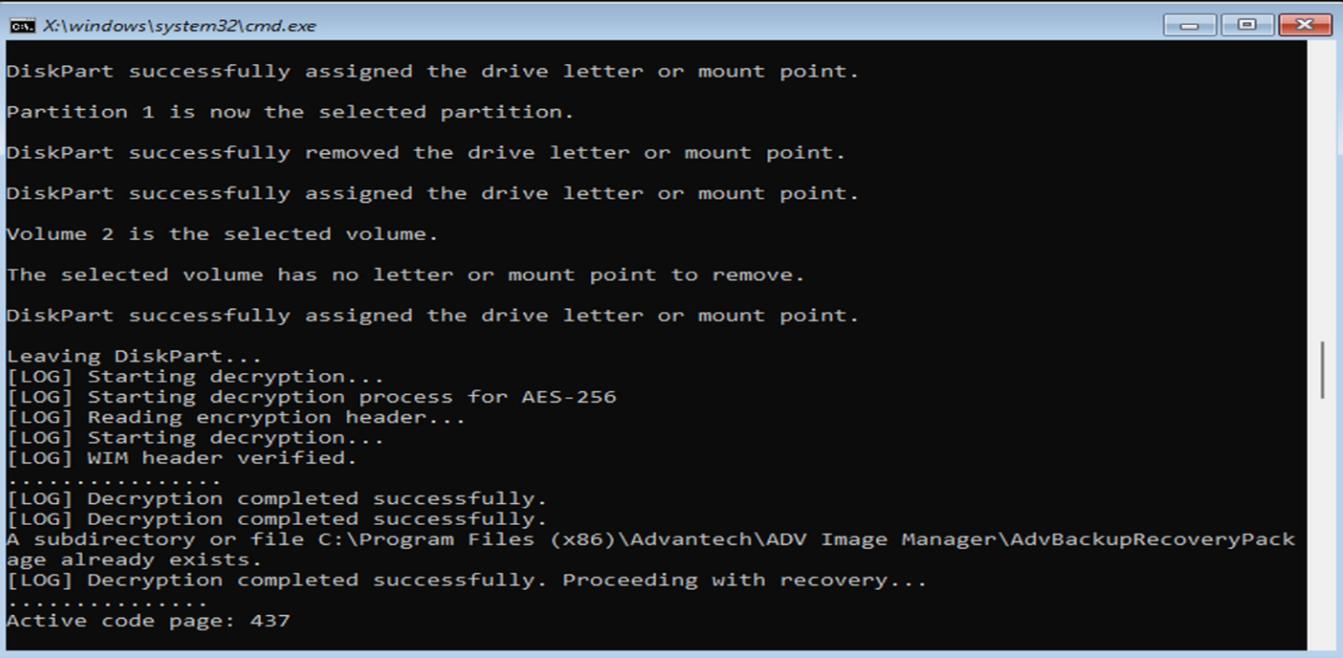
Click Recovery and Confirm to restart into WinRE and start recovery. The backup file is restored to C:, and all changes made after the backup file was created are lost. Keep ADV Image Manager open and keep the command prompt focused during recovery.
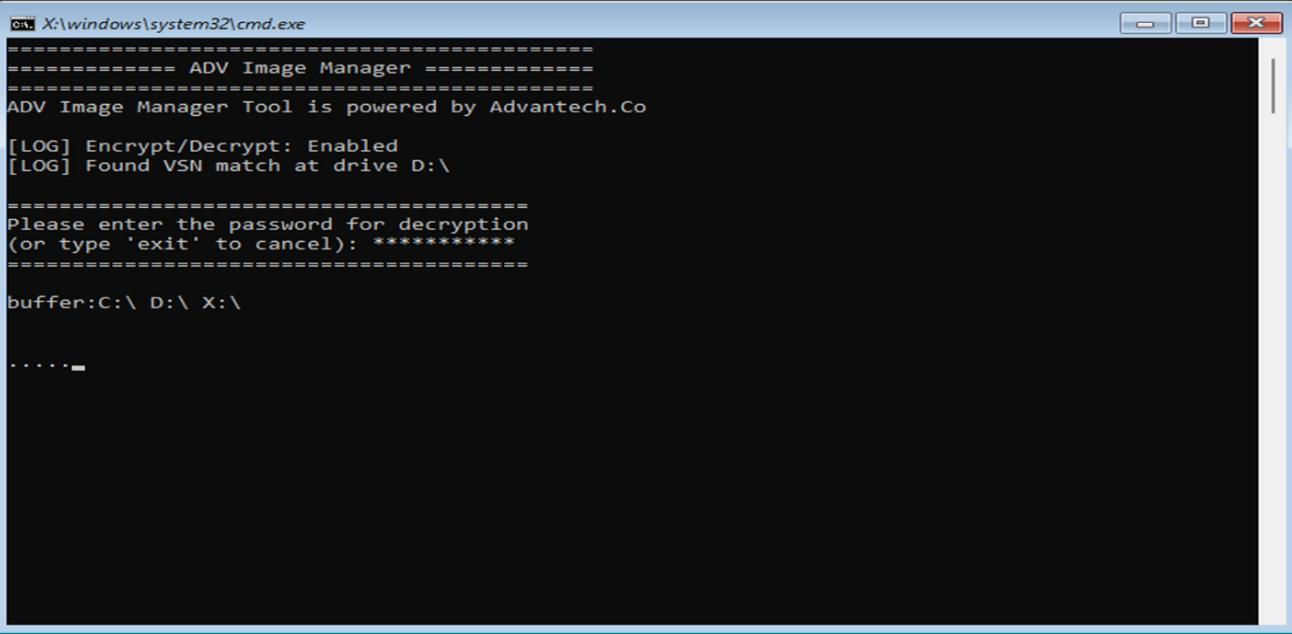
If restoring from an encrypted backup file (.enc), enter the password first. Users have three chances to enter the correct password. When recovery is finished, the system automatically restarts into Windows and users can check the recovery result in ADV Image Manager.
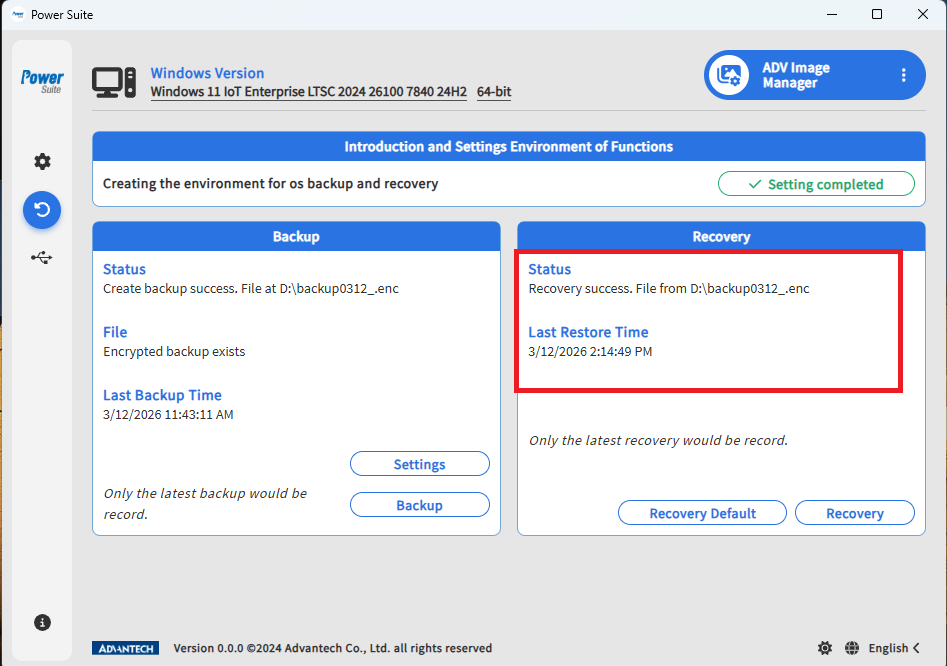
Recover Image from EFI Shell
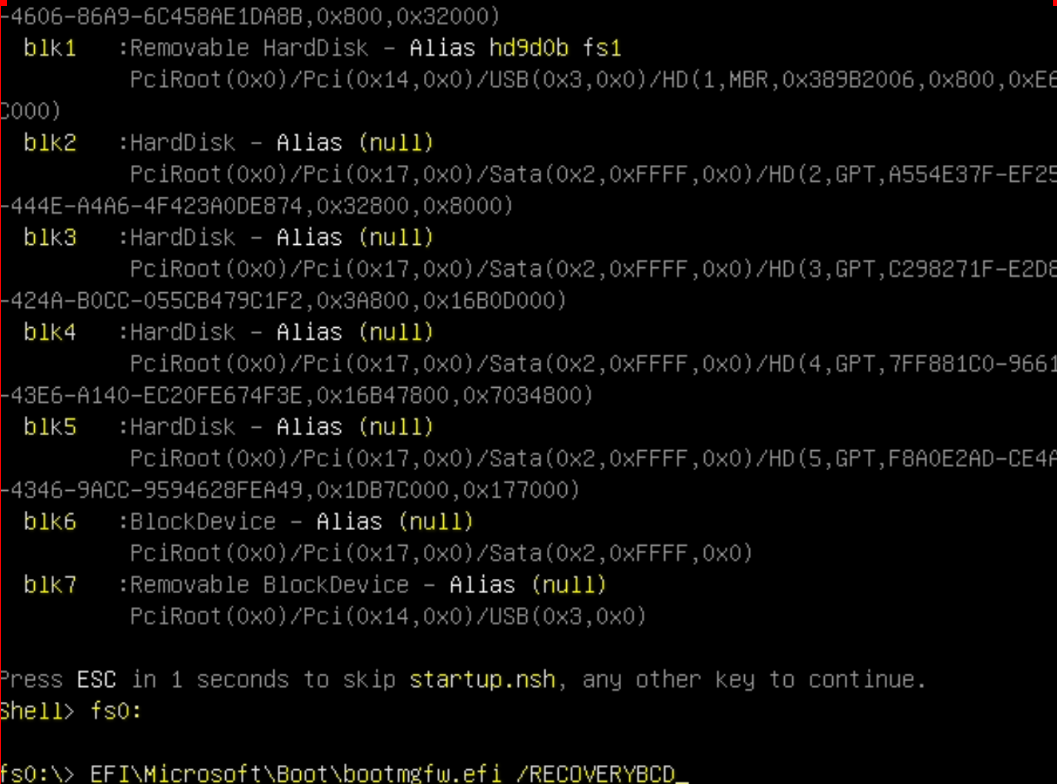
Besides starting recovery from the desktop application, ADV Image Manager can start recovery from WinRE through EFI Shell. Use this method when the computer cannot enter Windows.
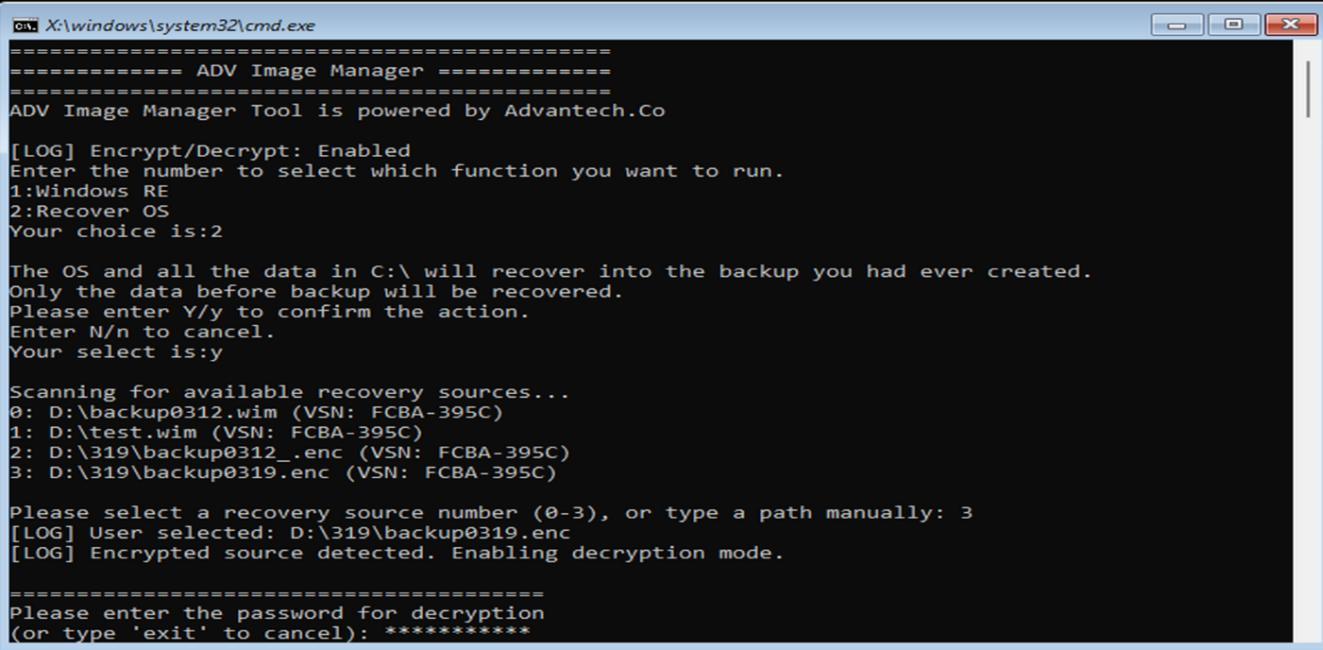
Use the BIOS built-in EFI Shell or a USB drive that includes EFI Shell to start WinRE. Run fsX: and then EFI\Microsoft\Boot\bootmgfw.efi /RecoveryBCD, where X is the selected file system number. Type 2 and press Enter to select Recover OS, then type Y or y to start recovery. Type N or n to cancel.
The system scans for available .wim or .enc files in the root directory and one level of subdirectories. Select the image to restore. Encrypted .enc files require a password; .wim files do not. This method is not supported on WoA.
Bootable USB Media
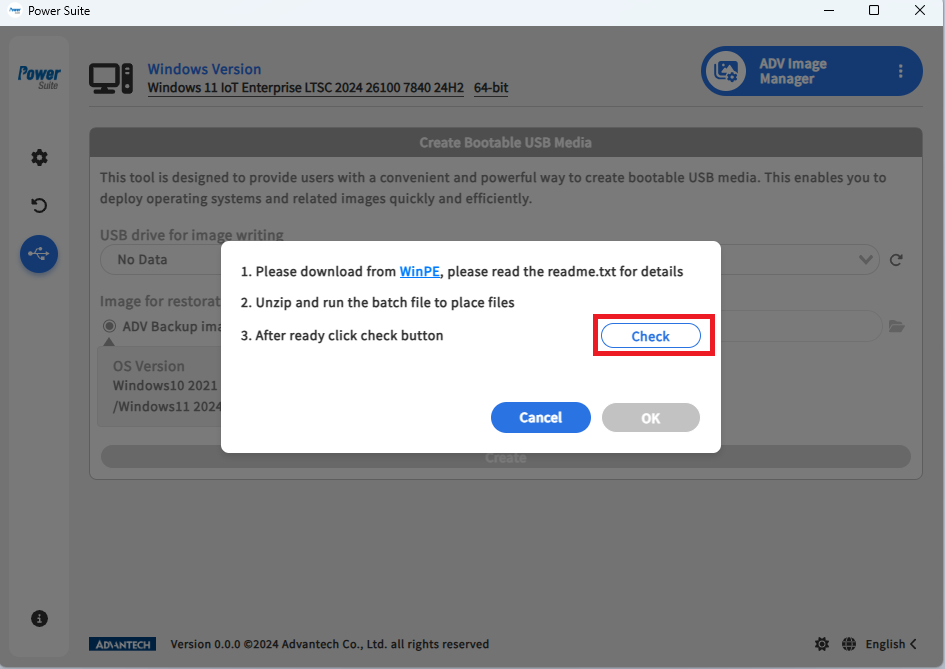
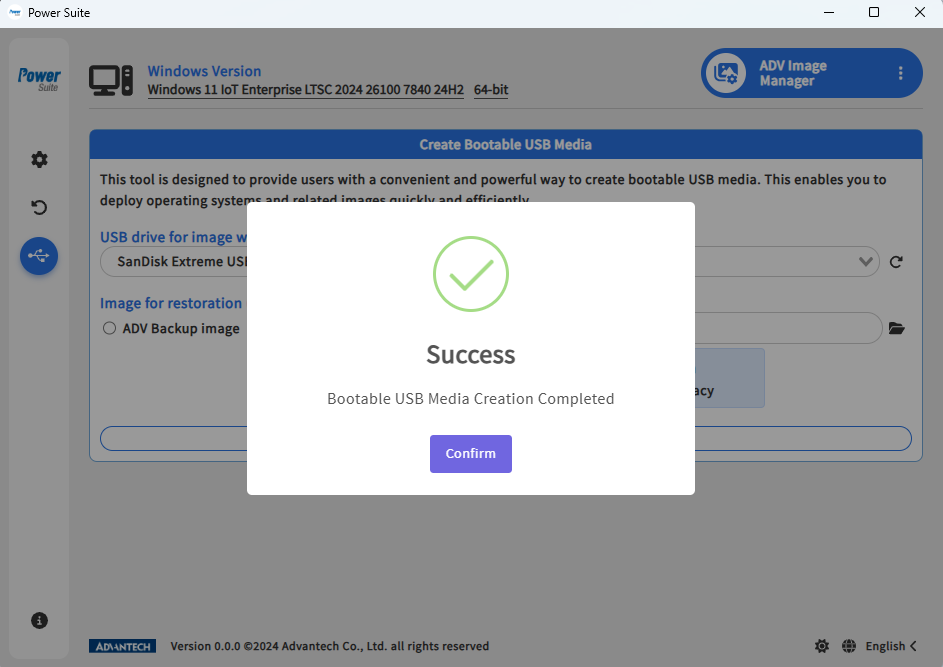
After the base backup file is created, users can create bootable USB media. Open the Bootable USB function page, download the required compressed package from the provided link, extract it, and run run.bat. After the process finishes, click Check to verify the environment. If verification passes, PASS is displayed and the page becomes available.
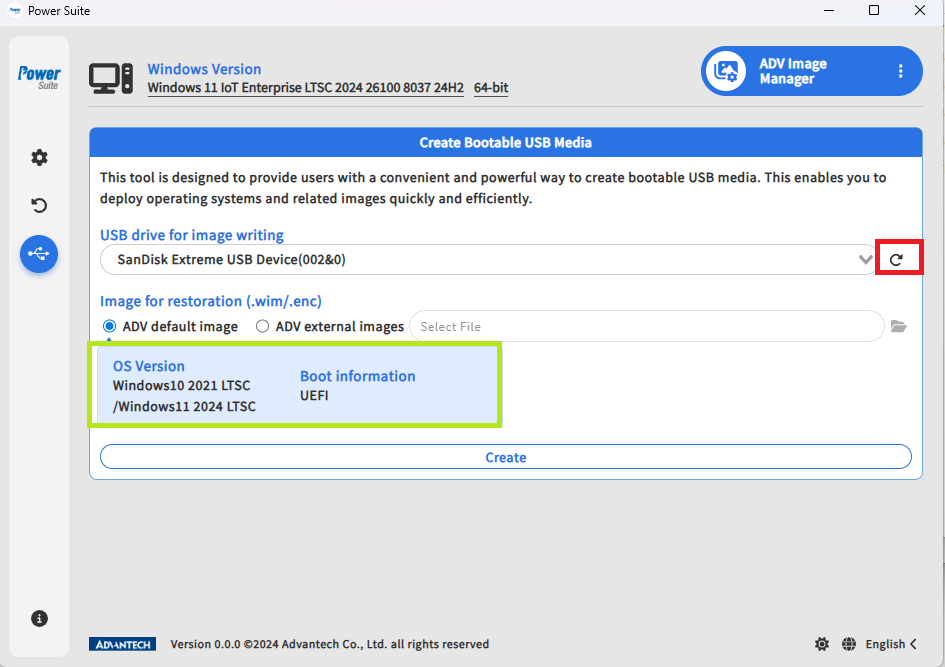
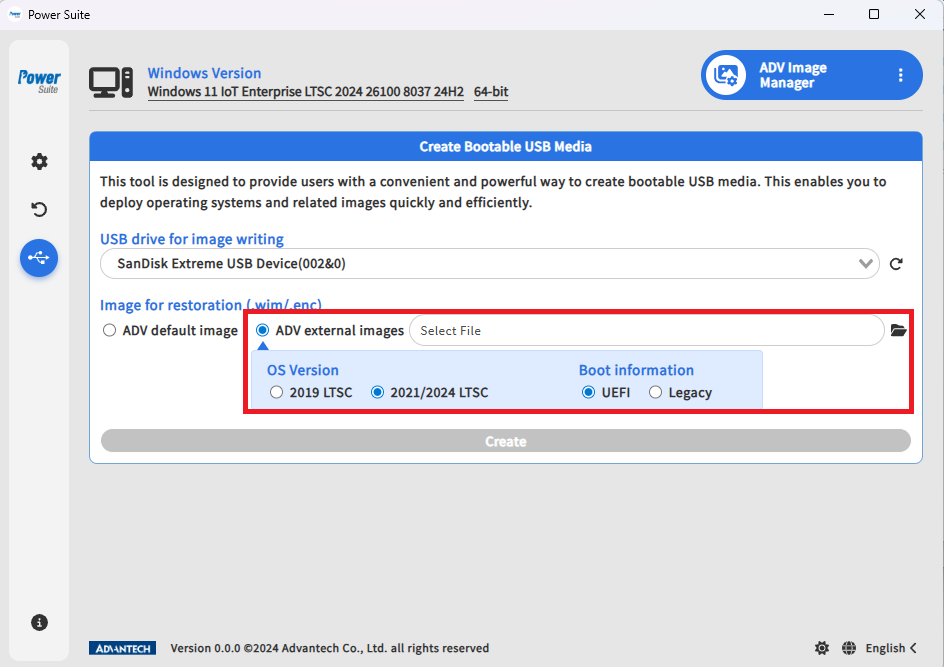
On the settings page, users can re-detect the USB device. If an internal backup file already exists, its information is displayed. To use another image, select Other Images and choose an external backup file. When using an external backup file, manually select the correct OS version and boot information. If those settings do not match the external backup file, recovery may fail.
For .wim files, the system performs a rule check before Create is available. If the rule check fails, an error message is displayed.
For .enc files, no rule check is required. Bootable USB Media is not supported on WoA.
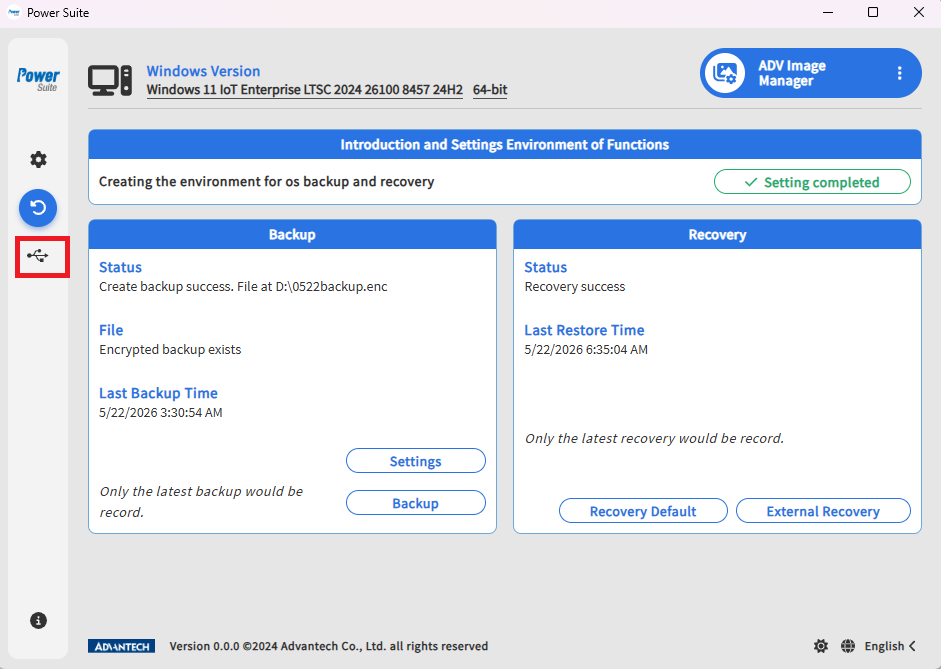
Recovery from Bootable USB
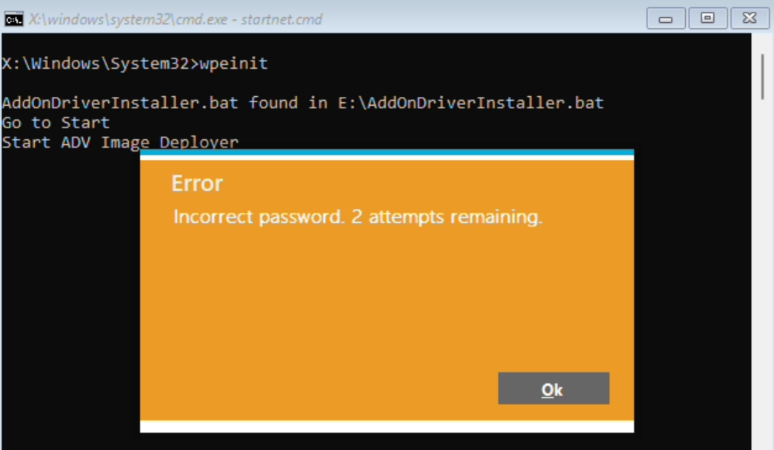
After the USB is created, reboot the system, enter BIOS setup, and change the boot order so the system boots from the USB device. If the image was created from an encrypted file (.enc), enter the password first. Users have three attempts to enter the correct password. If a .wim file is used, password verification is skipped.
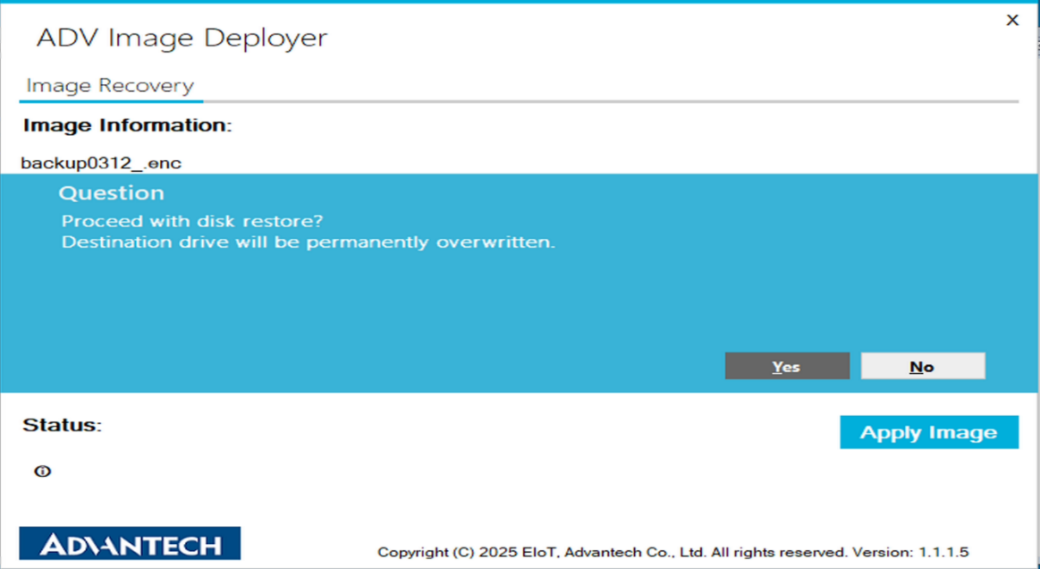
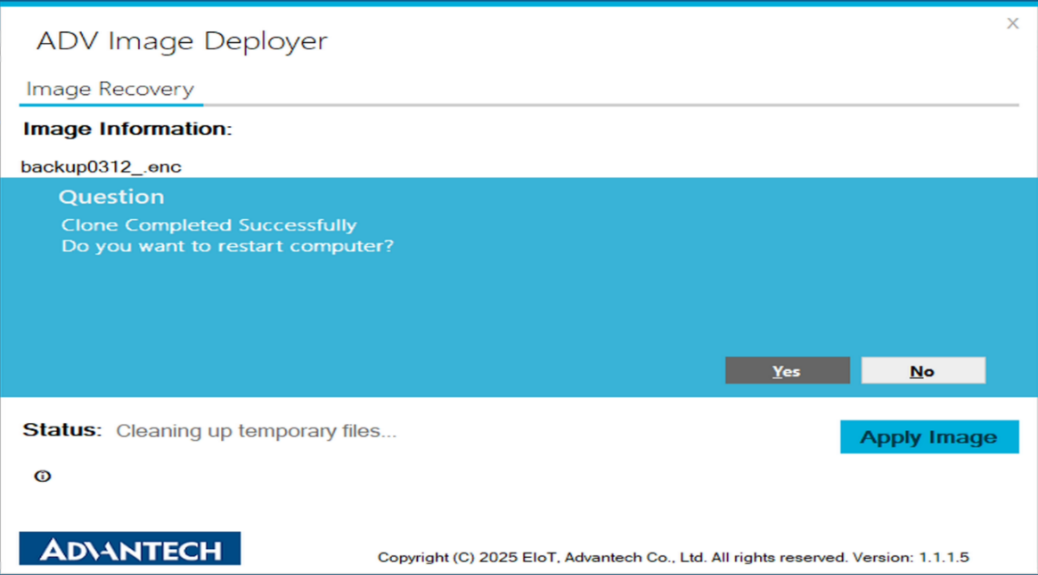
After entering the main screen, the backup file name appears at the top. Select the destination where the image will be restored and make sure the correct destination is selected. Click Apply Image, confirm with Yes, and monitor progress in the Status section. After completion, restart the system.
Ubuntu Workflow
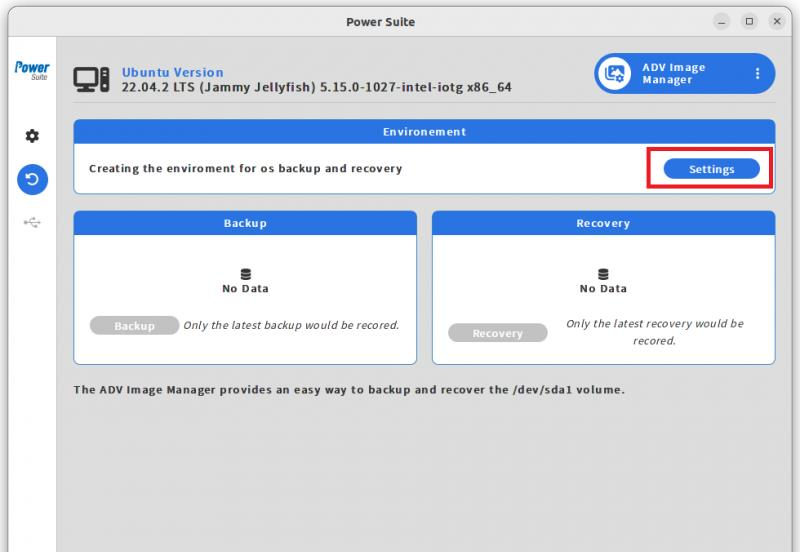
Environment Settings
Ubuntu ADV Image Manager creates a partition on the system disk to store the backup image. The environment is required before backup and recovery can be used.
- Secure Boot must be disabled in BIOS.
- The device must have at least 64 GB of disk space.
- More than one Ubuntu system on the same computer is not supported.
- During environment setup, do not plug in or remove external storage devices.
- Do not change disk partitions during setup.
After the environment is created successfully, the Settings button is hidden.
Backup
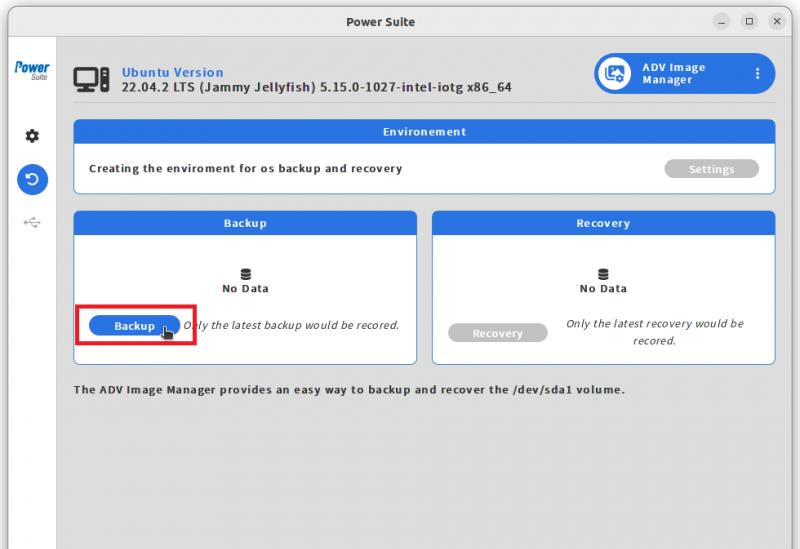
Click Backup and confirm to start system backup. The system restarts into backup mode and begins creating the backup image.
Do not close ADV Image Manager after backup starts.
When backup completes, users can verify the backup status and timestamp from the Image Manager page.
Recovery
Click Recovery and confirm to start system recovery. The system restarts into recovery mode and restores the backup image.
After recovery completes, users can verify the recovery status and recovery timestamp. Use this workflow when the Ubuntu device needs to return to its saved system state.
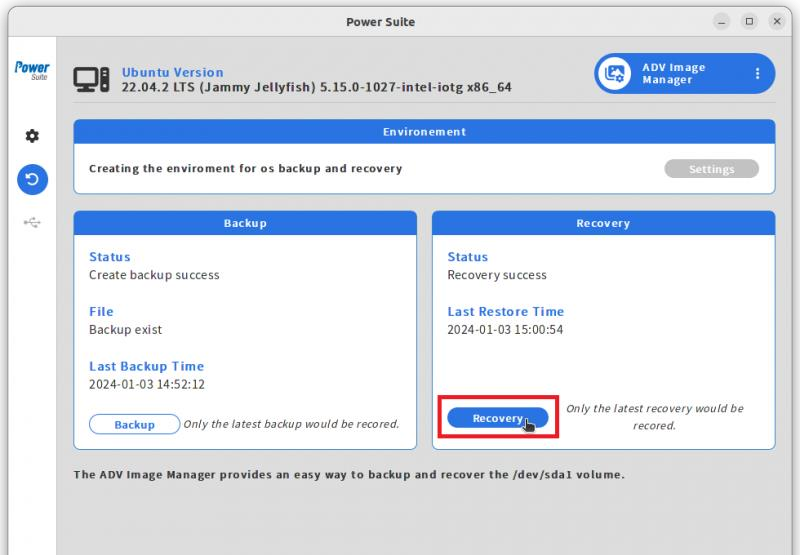
Image Deployer
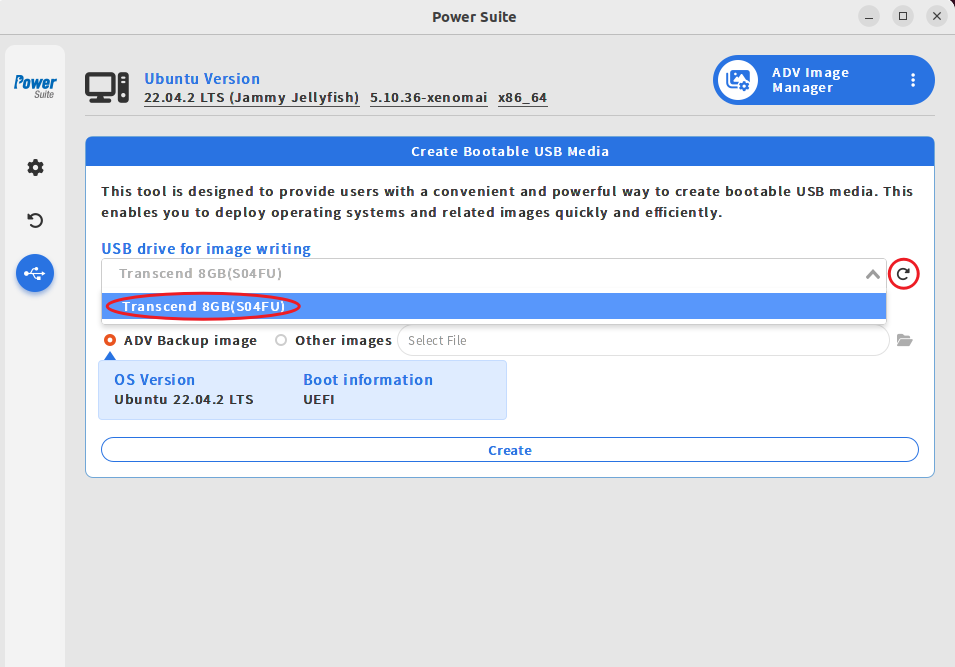
Image Deployer creates a rescue USB flash drive with a backup image. Users can select an internal image from the hidden disk partition or an external image from the system path.
- The USB size should be equal to the used system size.
- USB Deploy Rescue supports only the Ubuntu system partition.
- Copying approximately 10 GB of images with USB 3.0 takes about 5 to 10 minutes.
Learn More
Microsoft Learn Supplement
ADV Image Manager gives users a simpler workflow around concepts that are usually handled with Windows deployment and recovery tools. Microsoft documentation describes how Windows images can be captured into a WIM file, applied back to a partition, and registered with recovery tools.
- Capture and apply a Windows image using a single WIM file - Background on native Windows image capture and restore concepts.